After picking up quilting as a hobby a dozen years ago, binding was one thing that took me a few years to learn. First I put a separate binding strip on each side of the quilt so there were raw edges on the corners. I only did that once.
Then I folded the back around from the front and top stitched it. (I still do that occasionally, but not too often.)
Then I discovered making a separate continuous binding. Corners were still a problem, but at least they were raw edge. Where the beginning and ending of the binding overlapped, I just showed one end underneath, turned the other end under and slip stitched it closed.
After someone showed me the corners, my bindings started looking MUCH better, but there was still the beginning and end. Another kind quilting soul (fortunately there are many kind quilting souls in the world) showed me how to take the quilt out from under the sewing machine and cut the binding just enough longer to finish off the binding with a straight seam. THEN my bindings finally looked good. You couldn't tell where I stopped and started because it looked like every other seam.
That was really a good method, but using a diagonal seam works even better. The problem was I had trouble figuring out how long the binding tail at the end should be. I used the Fons & Porter method successfully, but I always had to refer to their "cheat sheet" to remember how to do it. Enter another kind quilting soul -- she showed me this method. . . .
I have seen it in a few places now. It is my all time favorite way to bind a quilt. That was the long way to say "Here is a free tutorial on Machine Binding. Enjoy!"

Give it a try and let me know what you think!


 Quilter Blogs & Store Search

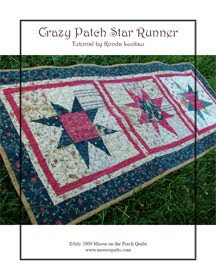 It is similar to other off kilter stars blocks online with a couple exceptions. First I, of course, used a charm pack to make mine. Second, I make my stars just a little differently because, well, just because I'm funny like that.


 Posts
Posts


